How To Design An Industrial Living Space That You’ll Love Spending Time In

I beam images in an industrial beach houseCreating a stylish living room that is suitable for lounging around and entertaining guests is a fantastic way to make your house feel like a home. While there are many different living room designs that you can incorporate into your space, industrial style living rooms have increased in popularity and have taken the interior design world by storm.

You may think that you need an open-concept loft space or warehouse to achieve the industrial look in your living room, but the truth is that industrial living room design is more than just exposed ductwork and floor-to-ceiling windows. With a few accents, additions, and touches, you can have an industrial vibe to even the most traditional living room. In this blog, our design experts shed some light on industrial interior design and share some simple ways that you can achieve the industrial look in your space.

Elements of Industrial Interior Design

The industrial interior design style came into existence nearly five decades ago, as property developers and architects started to convert warehouses, factories, and other industrial buildings into modern homes. The popularity of the look has increased tenfold in recent years, and shows no signs of slowing down — it’s safe to assume that the industrial interior design style is here to stay. Industrial style interior design typically consists of stripped back architectural details including the use of brick, metal, and wood, as well as salvaged and recycled materials.

How to Create Achieve Your Own Industrial Living Space

The industrial look remains one of the most timeless styles you can achieve for your living room and throughout the rest of your home. The best benefit in creating industrial style spaces is that you’ll have the opportunity to customize the look using furniture and decor that are entirely unique to your home. When planning an industrial style living room for your abode, keep these tips in mind.

1. Utilize Neutral Colors

One of the most notable things about industrial style interior design is the rich color palette it incorporates into your space. Brown, white, black, and other neutral tones create a clean, minimalist, and harmonious look. Consider pairing different shades of brown and tan to get a more relaxing space, adding white elements and black accents to both create clean contrast and character.

2. Open Up Your Space

Warehouses, factories, and other industrial buildings were typically large, open spaces. Industrial living room interior design is often incorporated into spaces with an open concept layout for that reason. However, you can recreate that same feeling in your living room regardless of your surroundings. Make function the focus of the space. Eliminate any clutter and keep pathways clear. Make sure that your living room furniture is arranged in groups to create areas for conversation and relaxation without disrupting the openness of the space. 

3. Incorporate Industrial Style Lighting

Lighting plays a huge role in interior design, especially when it comes to a space like your living room. While every interior style has its own preferred lighting choices, industrial lighting choices are unique in a way that they have the ability to create a statement in your space. The most popular industrial style lighting is made of metal and often consists of a combination of pendants and lamps — the light bulbs often vary in both size and shape and it’s common to find fixtures being hung straight down from the ceiling. Other popular features for industrial style lighting are wood or metal details and unconventional objects, such as repurposed pipes and chains, as parts of the lamps or fixtures.

4. Highlight Exposed Structural Elements

If your space already has exposed structural elements and finishes, you’re already a step ahead of most homeowners that want to achieve the industrial style in their living space. Brick walls, concrete floors, ductwork, and pipes are elements that, besides being typical features of industrial style, are unique to your space and will certainly add character. If you have these elements in your space already, draw attention to them by painting them a contrasting color.

5. Add Metal Accents

Metal accents are another staple of industrial style interior design. In modern living rooms with industrial style, it is common to see metal pieces used to introduce black accents to the space. When thinking about which metal accents to incorporate into your space it is important to remember that, in an industrial interior setting, metal accents can go further than just you may think. Look to add a touch of metal wherever you can to add to the industrial style of the space. Shelving units with a metal structure, tables and chairs with metal legs, and other metal decor and accessories will bring glamour and cohesiveness to your space.

6. Consider Faux Steel Beams

What is the best and easiest way to achieve the industrial look in your living room? Installing faux steel beams is a great start! Faux steel beams manufactured by Volterra Architectural Products are the perfect solution to transforming both the look and feel of your living space. They are manufactured using lightweight hardwood material, making them incredibly easy to install compared to real metal ceiling beams. If your space doesn’t naturally have the exposed structural elements of an industrial building, decorative steel beams are an easy solution. Not only that, but their realistic appearance and black color add appeal, contrast, and depth, to any space in which they are installed. To learn more about faux metal beams, click here.

Industrial interior living room design allows you to achieve a space that embraces antique beauty while still enjoying modern conveniences. Remember, you don’t have to live in an open loft or renovated warehouse to achieve the industrial look you desire. Use the tips above to transform your living room into an industrial setting.

If you are interested in enhancing your space with faux steel beams, Volterra Architectural Products has what you need. If you’re looking for a more rustic design for your space, we also manufacture quality faux wood beams. Shop our selection of decorative ceiling beams today.

How to Trim Faux Beam Straps

An image of a faux beam strap with clavos from Volterra Architectural Products

Faux beam straps manufactured by Volterra Architectural Products are designed to hide gaps and accent both faux wood or real wood ceiling beams. These beam straps, as well as the other beam accessories that we offer, are manufactured with an incredibly flexible and durable resin material.

Our selection of faux iron beam straps are meant to be used with our high-quality faux wood beams. However, the beam size that you need will often be different from what others need, and therefore, we produce our beam straps to be longer than what is typically needed. Fortunately, our flexible beam straps are easy to trim and install.

How to ‘Trim to Fit’ Faux Beam Straps from Volterra

If you have ordered Volterra’s beam straps to install on your faux wood beams, you will need to trim them before installing them so that they will fit properly. Doing so is simple, and in this blog, we are going to walk you through the required steps. Before starting, make sure you have a steel framing square and a sharp razor blade ready-to-go.

Step #1: Determine the Measurements

Before you trim your beam strap to fit, make sure you have the right measurements. By strategically placing a properly measured beam strap, you can make the faux wood beams in your home look even more real while adding more depth and detail. One you have the measurements, feel free to mark the beam with a pencil.

Step #2: Start Making the Cut

Using a steel frame, line up where you will be trimming the beam strap. Next take a razor blade to score the material at the trimming point. Use the razor blade to continuously go through the material until the cut has been made. This should leave you with a nice, square cut.

Step #3: Get the Strap Ready for Installation

When you have trimmed the beam strap to fit your faux wood beam, there are a couple more things you can do before installing them. First, you should make sure that dust and debris is removed from the beam strap. This can be done by using acetone and cloth. Additionally, you can make the strap look even more like forged iron by preparing them with spray paint. Additionally, you can add a custom finish to faux beam straps by using a metallic pewter finish. Once you have prepared your beam straps and are ready to install them on faux wood beams, watch this video.

There you have it! By following these steps you should have no trouble trimming your faux beam straps to get them ready to install on your faux wood beams.

Order Volterra Beam Straps for You Faux Wood Beams

If you want to add depth and detail to your space, order flexible beam straps are a great way to do so. Visit our website to browse our selection of beam straps and other flexible beam accessories. Contact us if you have any questions and our team will be happy to assist you!


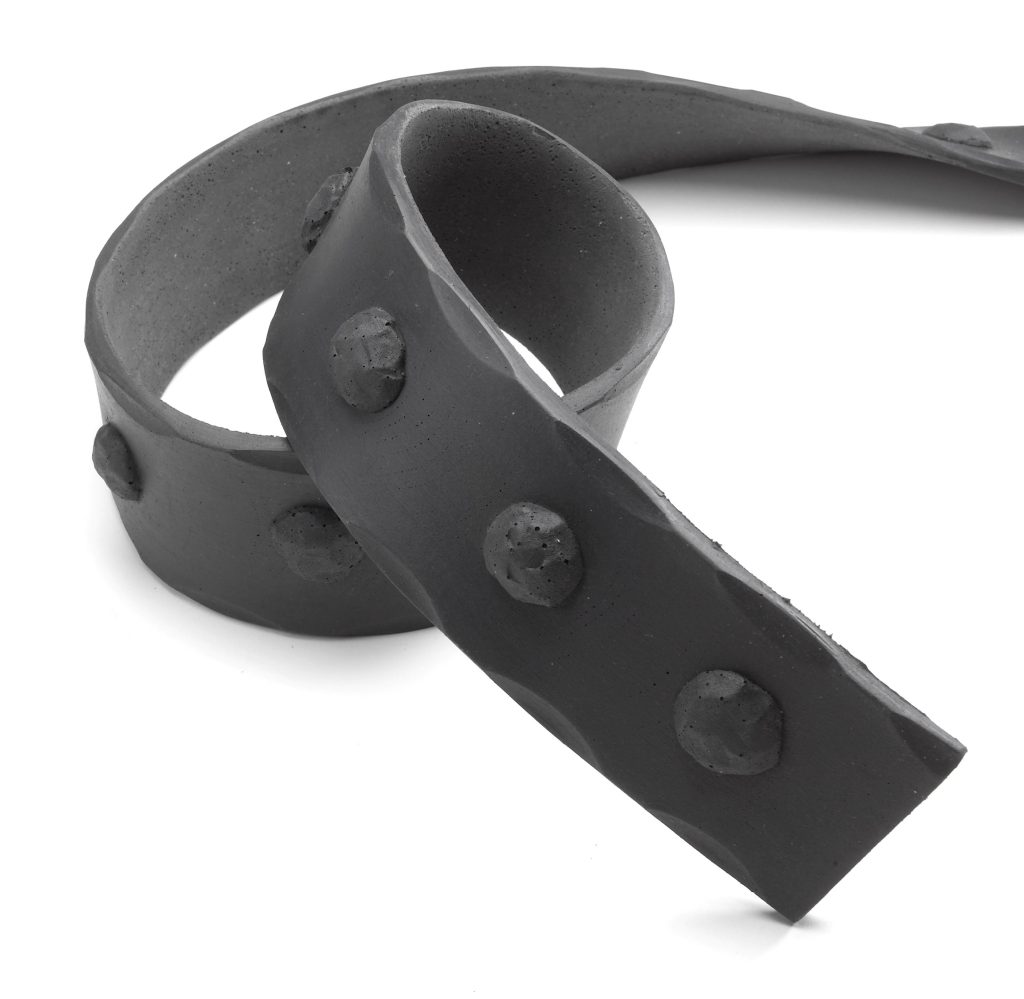
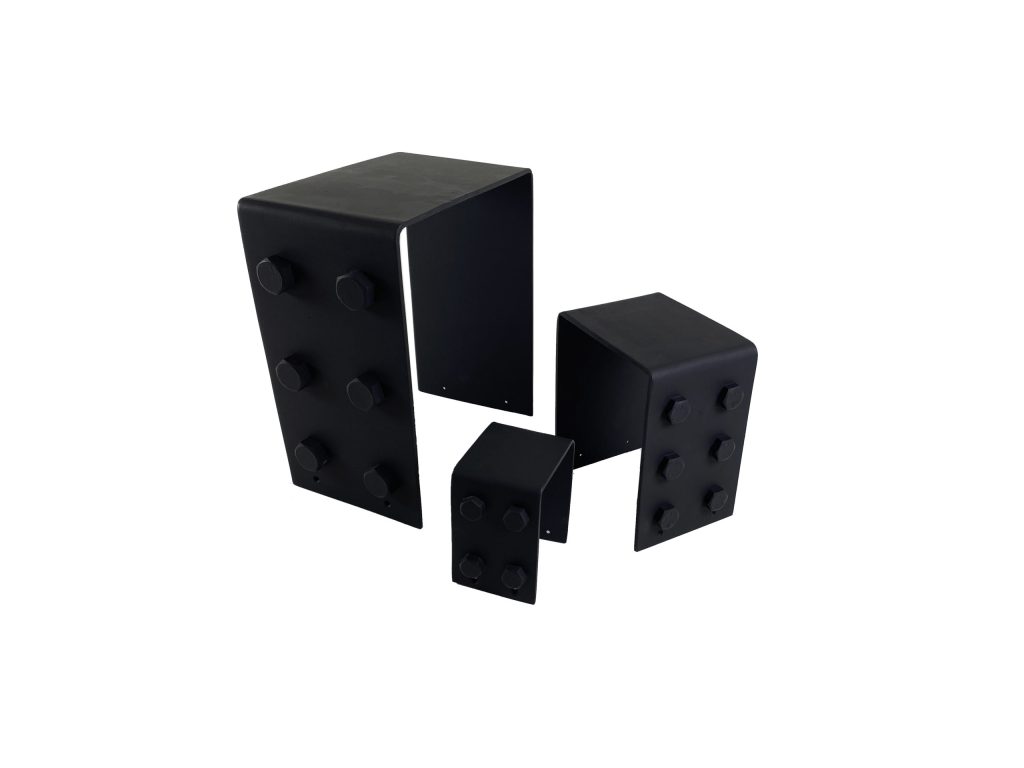
How to Prepare VolterraFlex®Faux Iron Beam Straps and Other Beam Accessories

By installing Volterra’s high-quality faux wood beams, you can easily add depth and elegance to any room in your home. Faux wood beams are versatile, functional, and are very easy to install compared to real wood ceiling beams. Of all the benefits that faux wood beams offer, perhaps the most appealing is that they replicate the appearance of ceiling beams that are manufactured from real wood.

While installing faux wood beams is sure to enhance any space, you can make them appear even more realistic while simultaneously adding more charm to the space by adding VolterraFlex® faux iron beam straps and other flexible beam accessories. We manufacture these products using a highly-durable and flexible resin material. They are incredibly easy to install on faux wood ceiling beams, too. Before installing them, however, we recommend properly preparing them so that they look even more real and last longer. In this blog, we are going to share some simple steps that will help you prepare your faux iron accessories. If you would like to see these steps, we encourage you to check out this video.

How to Prepare VolterraFlex® Faux Iron Beam Straps and Other Beam Accessories

Preparing faux iron beam straps and other beam accessories does not require a lot of work or supplies. We recommend spraying these flexible beam accessories with rattle-can spray paint. The color choice is up to you, but using a flat matte spray paint will make these faux iron straps and accessories look even more like authentic forged iron. Applying spray paint will not only make it look better, but it will also help it last longer. In the video, Tim from Volterra Architectural Products walks you through how to prepare flexible beam straps, which we will reference for the sake of this post. Keep in mind, a similar process can be used for hangersplatest-plates, and other beam accessories. Before you are ready to paint your beam strap, make sure you have measured and cut it to the necessary size, then follow these steps:

Step #1: Prepare Work Area

If you want to keep the mess minimal you should create a workspace to paint your flexible beam straps. We recommend setting a table up outside with an old bed sheet laying over the top so that it does not get paint on it. Make sure you have your spray paint and that it has been well-shaken and ready to go.

Step #2: Apply the First Coat of Spray Paint

When you are ready to apply the first coat of paint. You really only need to dust the flexible beam strap with the paint. Press down on the tip with the can about 10″ to 12″ away from the strap, aimed to one side, then, in one fluid motion, sweep the paint horizontally across the surface and release the tip when you reach the other side. For complete and consistent coverage, be sure to start the spray before reaching the surface, and release it after passing it. You’ll also want to make sure that you get the edges.

Step #3: Add A Second Layer

After the application of the first layer, wait a few minutes and then get ready to add a second layer. Following the same application method, dust the beam strap with paint again. This additional layer will create a special finish, making the faux beam strap appear like real iron.

Step #4: Install the Beam Strap

Once you are finished, you’ll want to let the beam strap dry before you install it on a faux wood beam. Once the material is dry, make sure to remove any dust and debris (acetone works great). When you’re ready to install your faux beam strap, watch this video or check out this blog.

See? It is as simple as that! Adding depth and detail to faux wood beams has never been easier! If you would like to transform your interior or exterior space, check out Volterra’s selection of faux wood beams plus the faux iron straps and other beam accessories. As one of the leading faux wood beam manufacturers in the US, you can trust that we offer quality products at a competitive price. Contact Volterra Architectural Products to learn more!

How to Apply Volterra Beam Straps and Other Faux Beam Accessories

Adding faux wood beams to the interior of your home is a great way to bring elegance to any room or space. These beams replicate the look of real wood beams, but are lighter, more durable, and cost-effective. Your faux wood beams can look even more authentic when complemented with faux ceiling beam accessories, such as beam straps, plates, and hinges.

At Volterra Architectural Products, we are proud to manufacture the largest and most distinctive line of flexible beam accessories that replicate forged iron. These non-functional beam straps, hangers, and plates add depth and detail to beams and trusses and are an excellent way to hide seams and gaps — flaws that are somewhat difficult to fill-in, yet these ceiling beam accessories offer a quick, easy, and attractive solution to that problem. 

How to Install Beam Straps & Other Faux Beam Accessories

While they look like authentic forged iron, our collection of VolterraFlex®️ beam accessories are manufactured with a rubber-like material. The good news is that this makes installation pretty simple, as long as you do it properly. In this blog, our experts share how to properly apply VolterraFlex beam straps, plates, and other beam accessories to our faux wood beams and trusses. Check out our step-by-step video for these instructions!

Step #1: Determine Where The Accessories Will Be Placed

A good place to start is by first determining where these faux beam accessories will be placed. Most people use them to wrap around beams for the purpose of covering gaps or for accentuating the beams. Once you find where these accessories are going to be placed, it’s a good idea to outline the placement with a light pencil marking to ensure accuracy.  Plates may be applied in a flat manner to the surface of the beam, but straps should be scored where they meet the corners as specified in techncal data / application instructions shown on the Volterra Products website.

Step #2: Apply Construction Adhesive

Once you have determined where the strap, plate, or hanger will be placed, you are ready to prepare it for placement. Start by applying a polyurethane construction adhesive to the back of the rubber-like surface. For plates and straps, about four to five beads of the adhesive are recommended. Then, using a putty knife, gently spread the adhesive. This may take some time as the material is slick and does not have a lot of absorption. 

Volterra Tip: Avoid spreading the adhesive to the edge of the accessories to prevent any mess when you apply it to your decorative beam or truss. 

Step #3: Apply More Construction Adhesive

To ensure a tight bond, apply a few more beads of construction adhesive on top of which you have already spread out. This time around, spreading the adhesive is not required, but make sure you are not going too close to the edge.

Step #4: Place the Beam Accessory on the Faux Wood Beam

Now that your beam strap, plate, or hanger is properly prepared, you can place it on the beam or truss. First, find your pencil marking and then gently place it on the surface of the beam or truss. Put some pressure on all areas of the beam accessory — you can also slowly slide it back and forth to spread the adhesive properly. Once you have it in the right place, take a pin nailer or a brad nailer to secure the strap to the beam or truss. It’s a good idea to nail close to the bolts so that the nail cannot be noticed. 

Step #5: Let the Adhesive Dry

Now it is time to let the adhesive work it’s magic. Make sure you give it enough time to dry. Before letting it sit, it’s a good idea to see if any glue has seeped out underneath the product where it has been applied. If so, simply wipe it away with a damp cloth. If you can see where the nails went into the strap, use a black magic marker to color in the nail head so it is not noticeable. 

Once everything has dried, you’re ready to hang your faux wood beam! For tips on how to install faux ceiling beams, watch this video. Once they are installed, you’ll love the look and feel they bring to your space.
If you are interested in purchasing faux wood beams plus the faux iron straps and other beam accessories that compliment them so well, visit Volterra Architectural Products today.

]]>

Mind the Gap – Hide Seams and Gaps with Beam Accessories

If you’re looking to take your ceiling to new heights and enhance the ambiance of a room, beam accessories can be a great way to achieve your design goals. At Volterra Architectural Products, we offer a wide range of beam accessories that can help you conceal any seams and gaps that may be created during installation.

Faux Wood Beams

Our faux wood beams are often used to hide ceiling imperfections and electrical wiring, and their corresponding beam accessories can help give them a more polished and finished look. Our faux wood beams are designed to look like real wood up close, making them a popular choice for achieving a charming, rustic look.

Flexible Beam Straps

One of our most popular beam accessories is our flexible beam straps, which mimic the look of forged iron. We offer a large selection of decorative accessories, including multiple sizes of beam straps, T-plates, double-bolt beam straps, hangers, nut heads, bolt heads, and clavos nail heads.

Accents

Real iron beam straps and plates are typically used to connect wood beams, reinforcing them where they meet. However, our decorative faux beams are lightweight and hollow, so heavy metal connectors for bracing purposes aren’t necessary. Our faux beam strap and plate accents, with coordinating fake nuts, bolts, and clavos, are finishing touches that create the appearance of actual rustic structural connectors in a faux beam or truss design.

Beauty & Function

Our beam accessories are designed to be both functional and beautiful, giving your ceiling a polished and finished look. They can be used to hide seams and gaps, while also adding a touch of style and sophistication to your design.

Whether you’re looking to create a traditional, rustic, or modern look, Volterra Architectural Products has the beam accessories you need to achieve your design goals. Contact us today to learn more about our products and how we can help you create the perfect space.

Leading the Industry in Faux Beam Accessories

Known as a leader in the faux wood industry, Volterra is expanding on this niche product line with a new line of flexible beam accessories.  Volterra Flex, a comprehensive line of flexible urethane beam plates, t-plates, hangers and straps, is designed to look identical to functional forged iron plates.]]>

Wood Beam Strap

Wood Beam Strap for HDF

]]>